Migrerad artikel
Denna artikel har migrerats från en tidigare version av vår webbplats och kan därför avvika i utseende och funktionalitet.
7 minuter
Note: This blog post assumes you've seen our introduction to Adaptive Images for Episerver.
The Adaptive Images add-on for Episerver has native support for Cloudinary, to enable image optimization, transformation, and global CDN delivery.
You need an Episerver website with the Adaptive Images add-on installed, as described in the introduction to Adaptive Images.
You also need a developer license to trial the Cloudinary integration. Request one from https://episerverimages.com if you don't already have one.
If you don't already have a Cloudinary account, go ahead and sign up for a free account.
During sign-up, make note of your "cloud name" (and perhaps change it to something more memorable) as we'll need it for the configuration:

Install the TedGustaf.Episerver.AdaptiveImages.Cloudinary NuGet package:
Once installed, you should have a few more app settings in web.config:
<add key="Cloudinary:CloudName" value="your-cloud-name" />
<add key="Cloudinary:UploadUrlPrefix" value="" />
<add key="Cloudinary:HostName" value="res.cloudinary.com" />
<add key="Cloudinary:PreserveTransparency" value="false" />
<add key="Cloudinary:MaxFilesize" value="10240" />
<add key="Cloudinary:MaxDimensions" value="25" />
Cloudinary:CloudName should be set to the cloud name you selected when signing up for Cloudinary.
Cloudinary:UploadUrlPrefix (optional) can be set to maintain individual collections of images in Cloudinary, for example to separate development, staging, and production environments, or to share a Cloudinary account for different websites altogether.
Cloudinary:HostName can be changed if you sign up for a higher-tier Cloudinary account with a custom hostname.
Cloudinary:PreserveTransparency should be set to true if you plan to use semi-transparent images and want to preserve the transparency in optimized/transformed images.
Cloudinary:MaxFilesize is specified in KB and should be changed if you upgrade your Cloudinary account to allow for larger source images. The default matches the 10 MB limit of free Cloudinary accounts.
Cloudinary:MaxDimensions is expressed in megapixels and should be changed if you upgrade your Cloudinary account to allow for higher image resolutions. The default matches the 25 megapixel limit of free Cloudinary accounts.
The Adaptive Images add-on is based on image providers to allow for multiple image sources, such as DAMs or image services such as Unsplash.
Each image provider has a name which must be configured in Cloudinary so that it may fetch images to transform and optimize.
If you have installed the Unsplash image provider as described in the Adaptive Images introduction, you will have two image providers registered: one called "episerver" for standard images uploaded in Episerver and one called "unsplash" for images originating from the Unsplash image service.
We need to configure Cloudinary for both these image providers by going to Settings > Upload in Cloudinary and specifying settings for Auto upload mapping:
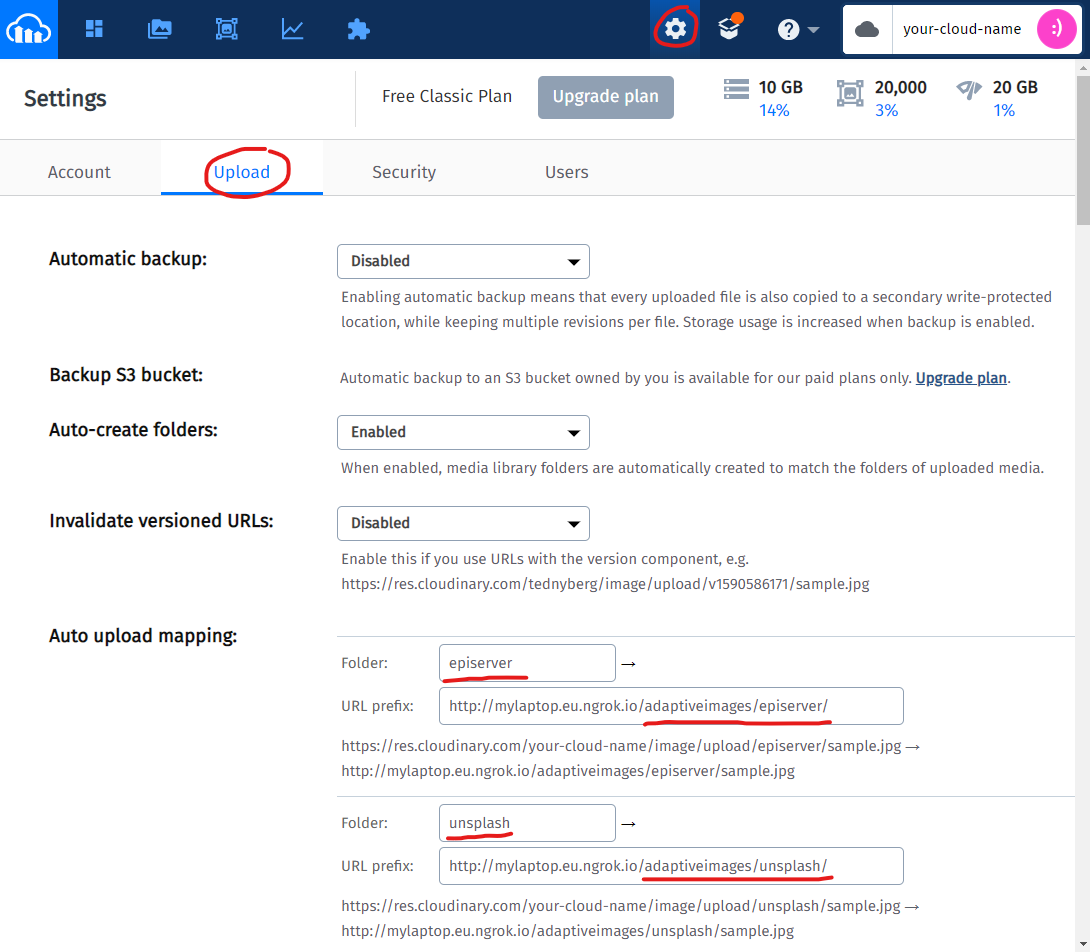
Folder should be set to the image provider name. The URL prefix should be set to the absolute URL of the image provider's endpoint on your website. The URL must be accessible over the internet and should look like: http://your-host-name/adaptiveimages/provider-name/ (note the trailing slash).
For testing the Cloudinary integration locally, your website needs to be accessible over the internet via domain name or IP address (we can't use localhost for the mapping in Cloudinary).
Personally I use ngrok for setting up a reverse proxy, making my development machine website accessible over the internet. You can sign up for free at https://ngrok.com/ but you need a paid subscription for custom hostnames.
If you don't want to use Cloudinary while developing locally, simply clear the Cloudinary:CloudName app setting.
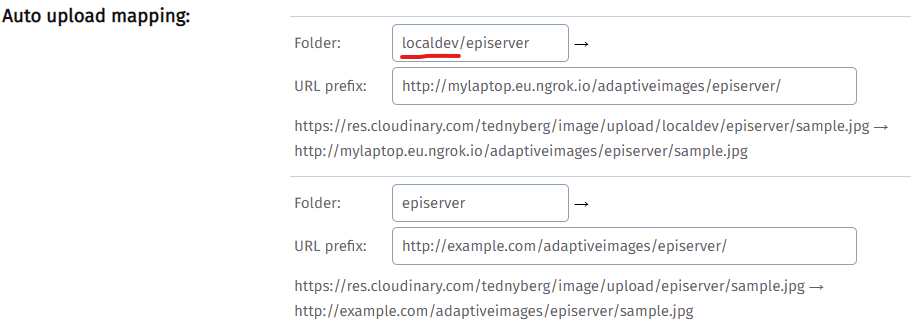
To separate your local assets from other environments, you can use the Cloudinary:UploadUrlPrefix app setting. For example, your could set it to "localdev" in your local development environment, and then set up separate mappings for the image provider(s).
Here is an example for the "episerver" image provider, where we use the "localdev" URL prefix locally, while the production environment is set up without any URL prefix:
What we did:
Now, if we rebuild/reload our website, we should see that images rendered on the website are indeed served by Cloudinary:
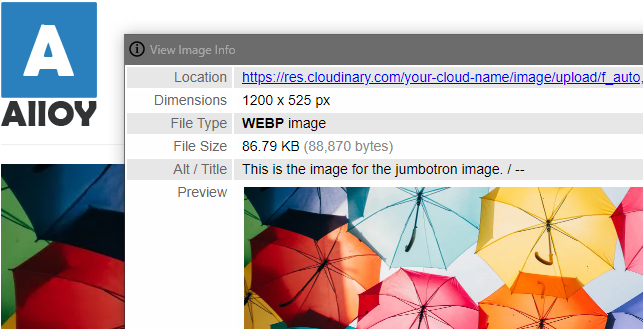
By using the Adaptive Images add-on with Cloudinary we get benefits like: