Creating a blank EPiServer website based on ETF
6 minuter
Översättning saknas
Update: A module installer for ETF is now available on Codeplex.
1. Install a blank EPiServer website
Install a blank EPiServer website just as your normally would using EPiServer Deployment Center:
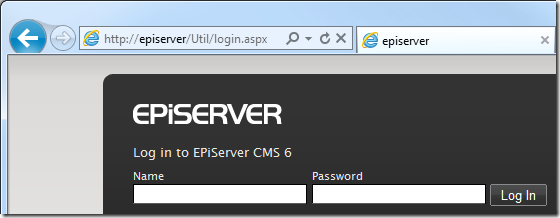
Next, make sure you can browse to your newly created website:
2. Open the EPiServer website in Visual Studio
A blank EPiServer website will not have a project file for Visual Studio, so we open the website using Open –> Web Site:
Note: we always convert real-life projects to Web Application Projects.
Start by modifying episerver.config to set the website’s siteDisplayName and pageStartId attributes (we set pageStartId to the value of pageRootId since we don’t have a start page yet):
3. Copy EPiServer Template Foundation binaries to your website
If you haven’t already, go to http://etf.codeplex.com to download ETF.
Unzip the EPiServer Template Foundation zip file – but make sure you unblock the zip file before decompressing it:
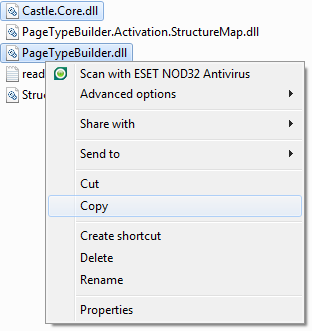
Copy TemplateFoundation.dll…
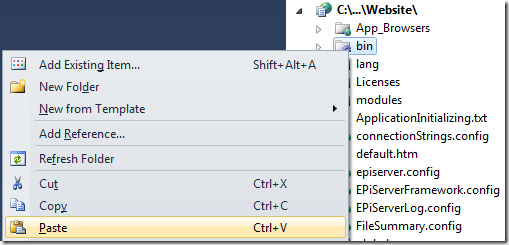
…and paste into your website’s bin folder:
Also copy PageTypeBuilder.dll and Castle.Core.dll to the bin folder (feel free to copy all Page Type Builder assemblies if you plan on using StructureMap):
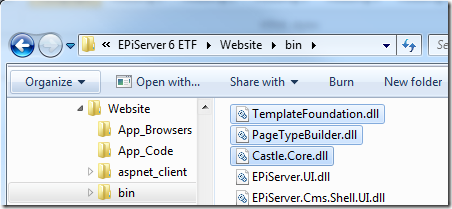
You should now have all three files in your bin folder:
4. Modify web.config
To get the most out of EPiServer Template Foundation we need to add some elements to web.config.
Dynamic Image Processor
Add the Dynamic Image Processor (or DIP) handlers to locations where you want to enable automatic resizing and rescaling of images:
<location path="PageFiles">
    <system.webServer>
        <handlers>
            <!-- Dynamic Image Processor -->
            <add name="png" verb="GET,HEAD" path="*.png" type="TemplateFoundation.Handlers.DynamicImageProcessor.Processor" />
            <add name="jpg" verb="GET,HEAD" path="*.jpg" type="TemplateFoundation.Handlers.DynamicImageProcessor.Processor" />
            <add name="gif" verb="GET,HEAD" path="*.gif" type="TemplateFoundation.Handlers.DynamicImageProcessor.Processor" />
            <!-- End Dynamic Image Processor-->
            <add name="webresources" path="WebResource.axd" verb="GET" type="System.Web.Handlers.AssemblyResourceLoader"/>
            <add name="wildcard" path="*" verb="*" type="EPiServer.Web.StaticFileHandler, EPiServer"/>
        </handlers>
    </system.webServer>
    <staticFile expirationTime="-1.0:0:0"/>
</location>
Additional handlers for ETF
Add the following handlers to the main <handlers> element:
<handlers>
    <clear />
    <add name="ScriptResource" verb="GET,HEAD" path="ScriptResource.axd" preCondition="integratedMode" type="System.Web.Handlers.ScriptResourceHandler, System.Web.Extensions, Version=3.5.0.0, Culture=neutral, PublicKeyToken=31BF3856AD364E35" />
    <add name="PageTypeIconHandler" preCondition="integratedMode" verb="GET" path="/TemplateFoundation/Images/PageIcons/*" type="TemplateFoundation.Handlers.EmbeddedImagesHandler" />
    <add name="TemplateFoundationImagesLoader" type="TemplateFoundation.Handlers.EmbeddedImagesHandler" path="/TemplateFoundation/images/*" verb="GET"/>
    <add name="TemplateFoundationHtmlLoader" type="TemplateFoundation.Handlers.EmbeddedHtmlHandler" path="/TemplateFoundation/*.html" verb="GET" />
    <add name="MetaWeblog" type="TemplateFoundation.MetaWeblog.MetaWeblogHandler" path="/metaweblog" verb="*" />
    <add name="LiveWriterManifest" type="TemplateFoundation.MetaWeblog.ManifestHandler" path="/wlwmanifest.xml" verb="*" />
    <add name="ReallySimpleDiscovery" type="TemplateFoundation.MetaWeblog.ReallySimpleDiscoveryHandler" path="/rsd.xml" verb="*" />
</handlers>
Simply copy the handlers above to the top of your main <handlers> element.
Add tag prefixes for web controls
Add the following ETF tag prefix to your main <controls> element to enable ETF web controls in your page templates:
<pages validateRequest="false" enableEventValidation="true" pageParserFilterType="System.Web.Mvc.ViewTypeParserFilter, System.Web.Mvc, Version=1.0.0.0, Culture=neutral, PublicKeyToken=31BF3856AD364E35" controlRenderingCompatibilityVersion="3.5" clientIDMode="AutoID">
    <controls>
        <add tagPrefix="ETF" namespace="TemplateFoundation.WebControls" assembly="TemplateFoundation"/>
        <!-- Default tag prefixes below -->
        <add tagPrefix="EPiServer" namespace="EPiServer.WebControls" assembly="EPiServer"/>
        <add tagPrefix="EPiServer" namespace="EPiServer.Web.WebControls" assembly="EPiServer"/>
        <add tagPrefix="EPiServer" namespace="EPiServer.Web.WebControls" assembly="EPiServer.Web.WebControls"/>
        <add tagPrefix="XForms" namespace="EPiServer.XForms.WebControls" assembly="EPiServer.XForms"/>
        <add tagPrefix="WebParts" namespace="EPiServer.WebParts.WebControls" assembly="EPiServer"/>
    </controls>
</pages>
Also add the following ETF tag prefix for use in EPiServer plugins, custom property controls, and other UI parts (note the <location> tag):
<location path="epi">
    <system.web>
        <httpRuntime maxRequestLength="1000000"/>
        <pages enableEventValidation="true">
            <controls>
                <add tagPrefix="ETF" namespace="TemplateFoundation.UI.WebControls" assembly="TemplateFoundation"/>
                <!-- Default tag prefixes below -->
                <add tagPrefix="EPiServerUI" namespace="EPiServer.UI.WebControls" assembly="EPiServer.UI"/>
                <add tagPrefix="EPiServerScript" namespace="EPiServer.ClientScript.WebControls" assembly="EPiServer"/>
                <add tagPrefix="EPiServerScript" namespace="EPiServer.UI.ClientScript.WebControls" assembly="EPiServer.UI"/>
            </controls>
        </pages>
    </system.web>
</location>
Setting request validation
If you intend to run EPiServer on ASP.NET 4.0 you need to set the requestValidationMode attribute on the <httpRuntime> element:
5. All done!
We now have a blank EPiServer website based on ETF. However, our website is still empty (we don’t have any page types or templates) so let’s test drive ETF by adding news publishing to our new website.


