Migrerad artikel
Denna artikel har migrerats från en tidigare version av vår webbplats och kan därför avvika i utseende och funktionalitet.
5 minuter
Custom Alerts exist to inform you of significant statistical variations as they happen, so that you can take action promptly. You decide yourself what the thresholds should be, to personalise it for your specific website.
Custom Alerts can monitor specific indicators on the site and alert you when showing a difference in your traffic that you would otherwise have missed, or noticed too late. Instead of continuously checking your reports for significant changes you can receive an email letting you know it happened on a daily, weekly or monthly basis.
With alerts you can take action to changes immediately. Alerts can tell you if traffic has stopped coming in, there is a sudden spike, less/more visitors are converting, bounce rate goes up/down, links have stopped working, loading time for pages is increasing, and much more. Custom alerts are great for staying on top of website performance before anyone even notices changes are occurring!
Creation of custom alerts can be made in admin mode in the column for View, or in Reporting mode within the Intelligence Events under Overview.
Say for example we wanted to get an alert when getting more visitors to our website than we normally expect. A spike in traffic could be a great thing, if it was due to something we had done to attract visitors due to their interest in our content, for example, but it could also be an indication that the website is under a spam attack! Learn more in our article on Identifying spam and ghost referrals in Google Analytics.
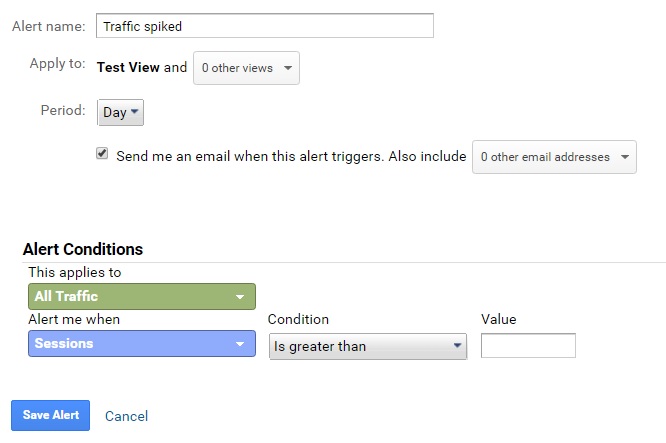
The dimensions are listed in the green box, where setting the attribute for your data. The preselection is All Traffic. The blue box contains the metrics which should be monitored in the alert.
One of the most important things to remember about alerts is not to set them up, but to react to the alert and make necessary changes when notified.
Use goals set up in Google Analytics to establish corresponding custom alerts, telling you when important changes for your business occur.
