Introduction to creating a widget (a.k.a dijit)
This post assumes you’re familiar with JavaScript and have at least heard of the Dojo JavaScript framework.
Dojo components are called dijits (a combination of the words Dojo and widget). In EPiServer 7 (this post is based on version 7.6) we can use dijits to create new editors for custom property types, or to create widgets for the assets pane, which is what we’ll do in this post.
Define a widget type
First off, we create a new class and decorate it with a Component attribute (part of the EPiServer.Shell.ViewComposition namespace):
[Component(PlugInAreas = PlugInArea.Assets, // Put our widget in the assets pane on the right-hand side in the EPiServer UI
           Categories = "cms", // For edit mode
           WidgetType = "hemso.capifast.XmlViewer", // Made-up namespace and name for our Dojo component (a.k.a dijit)
           LanguagePath = "/widgets/CapifastXmlViewer")] // Path to translations in a standard language file
public class CapifastXmlViewer
{
}
The PlugInAreas and Categories attributes are used with pre-defined values to let EPiServer know that this widget should be included in the assets pane in edit mode.
The WidgetType attribute is used to set a fully qualified widget name (i.e. including a namespace).
Widget namespace must be lower-case
It’s imperative that the namespace is in all lower-case, otherwise your widget won’t be found, probably with a 404 pointing to /EPiServer/Shell/7.x.x.x/ClientResources/[…].
Register widget namespace in module.config
If you don’t already have one, create a file called module.config in the root of your web application. Then add something like the following to it:
<?xml version="1.0" encoding="utf-8" ?>
<module>
  <dojoModules>
    <add name="hemso" path="Scripts/widgets" />
  </dojoModules>
</module>
Note the name attribute, which is in fact a base namespace mapped to the virtual path specified by the path attribute (which in turn is relative to ClientResources in the website root).
Since our widget namespace is hemso.capifast, EPiServer (or Dojo, rather) will look for our widget in /ClientResources/Scripts/widgets/capifast:
That’s actually our base path specified in module.config, with a path-ification of the widget namespace appended to it (excluding the base namespace specified through the name attribute in module.config).
Not sure how well I explained that, but if you look at the namespace used in the Component attribute…
…and compare it to the entry in module.config…
…you will hopefully see a pattern emerging for the full widget path:
Create a basic widget
If you don’t have one already, create a folder called ClientResources in your website root, and subfolders mapping to your namespace (as configured earlier).
Create a JavaScript filed named according to the dijit name specified earlier, such as XmlViewer.js in this case:
Let’s add some basic markup to it just to check that everything is working properly:
define([
    "dojo/_base/declare",
    "dijit/_WidgetBase",
    "dijit/_TemplatedMixin"
], function (
    declare,
    _WidgetBase,
    _TemplatedMixin
) {
    return declare("hemso.capifast.XmlViewer",
        [_WidgetBase, _TemplatedMixin], {
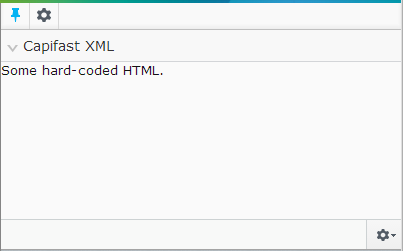
            templateString: '<div>Some hard-coded HTML.</div>'
        });
});
This dijit includes some of the most basic necessities of an EPiServer widget.
Localize the widget name
Although not required, we specified the LanguagePath property of the Component attribute earlier:
This means we need to add something like the following to a language file (note the <title> element in addition to the language path we specified):
<?xml version="1.0" encoding="utf-8" ?>
<languages>

  <language name="svenska" id="sv">

    <widgets>
      <CapifastXmlViewer>
        <title>Capifast XML</title>
      </CapifastXmlViewer>
    </widgets>

  </language>

</languages>
Our new widget in action
Now if we build and reload our site and go into edit mode we should see our new widget in the assets pane on the right-hand side:
A (really) short introduction to AMD
First of all, if you’re not familiar with JavaScript frameworks using Asyncronous Module Definition (AMD), such as require.js or Dojo, you may want to to read up on it, or just be content knowing it’s a way of defining dependencies for JavaScript modules.
Basically, the pattern is to first define our module’s dependencies…
…and then declare arguments in the same order for a function which will initialize the module (the names do not have to match, although it makes for easier-to-read code):
Adding a widget template
Dojo supports different ways of separating views from JavaScript modules. To use templates we define a dependency to _TemplatedMixin.
We can replace our previous hard-coded HTML with a URL to have our widget display a view served by a standard ASP.NET MVC controller:
define([
    "dojo/_base/declare",
    "dijit/_WidgetBase",
    "dijit/_TemplatedMixin"
],function (
    declare,
    _WidgetBase,
    _TemplatedMixin

) {
    return declare("hemso.capifast.XmlViewer",
        [_WidgetBase, _TemplatedMixin], {
            templateString: dojo.cache("/CapifastXmlViewer")
        });
});
In order to serve the widget view through this URL we create a standard controller called CapifastXmlViewerController, making sure to add an Authorize attribute since this controller should only be accessible by web editors and administrators:
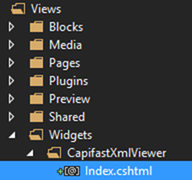
Now let’s create a well-familiar ASP.NET MVC view…
…and add some sample markup to it:
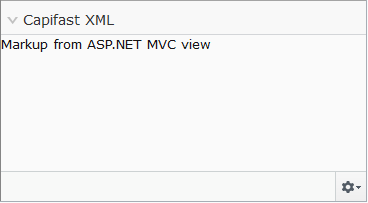
Now if we rebuild and refresh the EPiServer UI we should see the widget present a standard ASP.NET MVC view:
Becoming aware of EPiServer content being edited
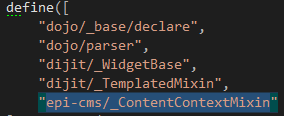
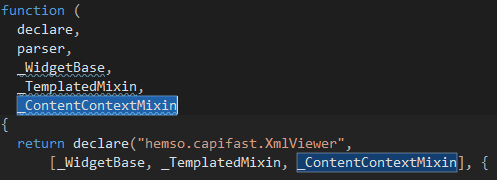
To make our widget aware of the content currently being edited, we add the ContentContextMixin to our list of dependencies…
…and add a corresponding argument to the function and insert the argument into our widget declaration:
Now we can add an event handler for the contextChanged event…
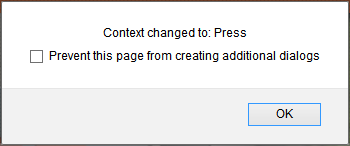
…resulting in an alert being displayed whenever the context changes, for example when we navigate to another page:
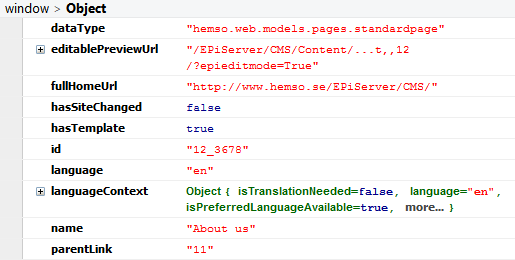
Of course this doesn’t do much, but let’s examine what we get inside that context argument by logging it to the console instead:
We actually get quite a bit of information about the content context, such as the “About us” page we navigated to here.
Next, let’s display something in our widget view whenever the content context changes.
Changing view contents from the widget module
This real-life scenario is based on a website where several pages are created automatically based on data from an underlying business system.
We want the widget to display data from the integrated backend system whenever we navigate to a piece of content that has been generated from it. The data is in fact plain XML.
First, let’s add some markup to our widget view. We want the editor to be able to easily copy the XML data, so we’ll add a <textarea> element:
Note that we’ve added a data-dojo-attach-point attribute to the <textarea>. By doing this Dojo will allow us to easily reference the <textarea> element from inside the widget code.
For example, we could add the following to print the name of the content being navigated to:
Now, if we reload the EPiServer UI and navigate to some content we can see that the widget is updated:
Now, instead of just printing the name of the page, let’s add an action method to our original controller to allow us to get the XML from the backend system:
Next, let’s revise our widget module to load this XML whenever the content context changes:
define([
    "dojo/_base/declare",
    "dojo/parser",
    "dijit/_WidgetBase",
    "dijit/_TemplatedMixin",
    "epi-cms/_ContentContextMixin"
],function (
    declare,
    parser,
    _WidgetBase,
    _TemplatedMixin,
    _ContentContextMixin
) {
    return declare("hemso.capifast.XmlViewer",
        [_WidgetBase, _TemplatedMixin, _ContentContextMixin], {

            templateString: dojo.cache("/CapifastXmlViewer"),

            contextChanged: function (context, callerData) {

                var that = this;

                that.xmlContent.value = 'Checking if "' + context.name + '" is relevant content...';

                $.get('/CapifastXmlViewer/Xml?id=' + context.id, function (xml) {
                    if (xml == null || xml == '') {
                        that.xmlContent.value = "XML view isn't available for this content.";
                    } else {
                        that.xmlContent.value = xml;
                    }
                });
            }
        });
});
Now, whenever the context changes (editor navigates to another piece of content) we use some standard jQuery to get the page’s underlying XML from the business system (if applicable).
First, we output a little “Loading” message to indicate that something is happening in the background…
If we’re not getting any XML it’s (probably) because we’ve navigated to a piece of content that didn’t originate from the business system:
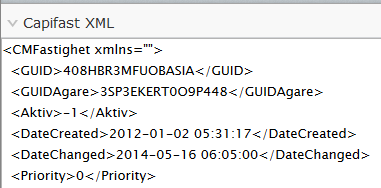
And finally, if we did get XML, we simply output it:
Protect the widget
In the interest of security you may want to add a web.config file to the Widgets view folder…
…and add something like the following to the <system.web> element to restrict access:
More Dojo examples
Be sure to check out the other EPiServer Dojo samples, including how to add a custom toolbar button.


