Add a custom toolbar button in EPiServer 7
14 minuter
Översättning saknas
Prerequisites
First of all, if you haven’t checked out my previous post on how to create an EPiServer widget for edit mode, please look through it as there are some key concepts in there that I won’t re-iterate in this post. Also, note that this post is based on EPiServer 7.6. If you’re running EPiServer 7.0 you want to check out this post with information on the changes that came with the upgrade to Dojo 1.8.3.
Scenario for this example
We have an EPiServer site where several of the pages are created based on data from a backend system. We want editors to have easy access to a button in the edit-mode toolbar that they can use to refresh the data from backend system, edit the page further if need be, and finally publish the updated page.
What our custom toolbar button does
Our button is displayed in the edit-mode toolbar, right next to the preview toggle button.
If we navigate to a page that didn’t originate from the backend system, the button is disabled:
However, as soon as we navigate to a page that can be updated from the backend system, the button is immediately enabled:
When we click it, the label is changed to indicate that something is happening in the background:
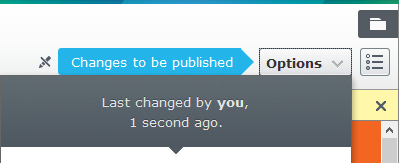
And when the update completes we can see two things happening. First, the button is once again enabled and an informative label is displayed…
…but we can also see that the content pane is refreshed and the Publish button indicates that the content has been updated. In other words it changes from this…
…to this:
Evidently, clicking the button updated the page just now (as expected) and we now have the option of publishing the page with the content that was retrieved from the backend system.
Adding a new button to the toolbar
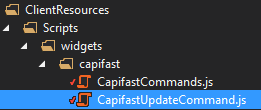
First we create a new JavaScript file in which we’ll add some code to add a new command (i.e. button in this case):
This JavaScript file will in fact be a Dojo module. This code is based on the example provided by Dojo guru Ben McKernan:
define([
    'dojo/aspect',
    "dojo/_base/declare",

    "epi/dependency",

    "hemso/capifast/CapifastUpdateCommand"
], function
   (
        aspect,
        declare,

        dependency,

        CapifastUpdateCommand
    ) {

    var handle,

        registry = dependency.resolve('epi.globalcommandregistry'),

        callback = function (identifier, provider) {

            if (identifier !== "epi.cms.globalToolbar") {
                return;
            }

            provider.addCommand(new CapifastUpdateCommand(), { showLabel: true, id: "CapifastUpdateCommand", disabled: true }); // Disabled until we navigate to relevant content

            handle.remove();
        };

    handle = aspect.after(registry, 'registerProvider', callback, true);
});
Basically it waits for an EPiServer command provider to register, and once registered we use it to add our custom button to it. Looking closely you might also notice that the Dojo module has a few dependencies, including our new CapifastUpdateCommand dijit, which we'll create next.
Creating a new command button
First we create another JavaScript file called CapifastUpdateCommand.js (remember how we specified a dependency to CapifastUpdateCommand earlier?):
The following code for CapifastUpdateCommand might seem a little daunting at first, but hopefully the comments will help clarify what it does. In short it responds to whenever the content being edited changes to enable/disable the button and handles the click event of the toolbar button.
define([
    "dojo/_base/declare",
    "dojo/_base/connect", // To be able to subscribe to events using Dojo's pub/sub model
    "dojo/_base/array", // Helpers for working with arrays

    "dijit/registry", // Used to look up added dijits

    'epi/i18n!epi/nls/widgets.CapifastUpdateCommand', // Enable localization using standard EPiServer language files

    "epi/shell/command/_Command" // Our command is, well, a _Command...
], function
    (
        declare,
        connect,
        array,

        registry,

        translations,

        _Command
    ) {

    // The button should only be enabled for these content types
    var applicableContentTypes = ['hemso.web.models.pages.premisepage', 'hemso.web.models.pages.buildingpage'];

    var currentContentContext;

    return declare([_Command], {

        name: "CapifastUpdateCommand",
        label: translations.labels.default,
        tooltip: "Updates the current page based on the underlying business system",
        iconClass: "epi-iconRelations", // Additional ready-to-use classes are available in EPiServer's Sleek.css
        canExecute: true,

        constructor: function () {
            // Subscribe to event to respond to whenever the editor navigates to
            // another piece of content in edit mode, or when the content changes
            connect.subscribe("/epi/shell/context/changed", this._contextChanged);
        },

        _contextChanged: function (context, caller) {

            // Get a reference to our button dijit using the ID we specified when we added the button
            var button = registry.byId('CapifastUpdateCommand');

            if(!button) {
                return;
            }

            // Disable button if content being edited isn't supported
            if (!context || array.indexOf(applicableContentTypes, context.dataType) == -1) {
                currentContentContext = null;
                button.setDisabled(true);
                return;
            }

            currentContentContext = context;

            // Re-enable the button and reset the label
            button.set('label', translations.labels.default);
            button.setDisabled(false);
        },

        // Event handler for when the button is clicked
        _execute: function () {

            var button = registry.byId('CapifastUpdateCommand');

            // Change the button label
            button.set('label', translations.labels.inprogress);

            // Disable the button while waiting for the operation to complete
            button.setDisabled(true);

            // Standard jQuery to call an action method of our ASP.NET MVC controller
            var request = $.ajax({
                url: '/CapifastUpdateCommand/Update',
                type: "POST",
                data: { id: currentContentContext.id },
                dataType: "json",
                success: function (result) {
                    var contextParameters = { uri: 'epi.cms.contentdata:///' + result };
                    dojo.publish("/epi/shell/context/request", [contextParameters]);
                    button.set('label', translations.labels.success);
                    button.setDisabled(false);
                },
                error: function (jqXHR, textStatus) {
                    alert('An error occured, unable to retrieve data from Capifast: ' + textStatus);
                    button.set('label', translations.labels.error);
                    button.setDisabled(false);
                }
            });
        }
    });
});
Creating the controller used to update the page
The click event basically triggers an AJAX call to the Update method of this simple ASP.NET MVC controller:
[Authorize(Roles = "WebEditors, WebAdmins, Administrators")]
public class CapifastUpdateCommandController : Controller
{
    [HttpPost]
    public ActionResult Update(string id)
    {
        var page = ServiceLocator.Current.GetInstance<IContentRepository>().Get<PremisePage>(PageReference.Parse(id));

        var updatedPage = UpdateFromBackendSystem(page);

        // Return identifier to the updated version of the page, i.e. page ID including work ID
        return new JsonResult { Data = updatedPage.PageLink.ToString() };
    }
}
Refreshing the content after update
If you look at the controller above you can see that the Update action method returns the full page version identifier, that is the content reference ID and the work ID concatenated, such as 123_456.
When the AJAX call receives this string back, it uses it to construct an edit URL for the updated page and then uses Dojo's pub/sub functionality to request a context change in EPiServer to display the updated page version:
var contextParameters = { uri: 'epi.cms.contentdata:///' + result };
dojo.publish("/epi/shell/context/request", [contextParameters])
Add the initializer module to module.config
If you’ve followed all the steps above you might be disappointed that the command button still won’t show up in edit mode.
The reason is simply that the CapifastCommands Dojo module we created initially still hasn’t been added to EPiServer.
To add our new Dojo module to EPiServer we edit the module.config file (more info on module.config can be found in the previous post on creating EPiServer widgets) to register the script used to add our command button.
The key is to add a <clientResources> element like the following:
<?xml version="1.0" encoding="utf-8" ?>
<module>

  <dojo>
    <paths>
      <add name="hemso" path="Scripts/widgets" />
    </paths>
  </dojo>

  <!-- Add the Dojo module used to register our toolbar buttons (name attribute must be as below) -->
  <clientResources>
    <add name="epi-cms.widgets.base" path="Scripts/widgets/capifast/CapifastCommands.js" resourceType="Script" />
  </clientResources>

</module>
The client resource name epi-cms.widgets.base is vital, it is what causes EPiServer to load the script specified by the path attribute (which is relative to the /ClientResources folder in your website root).
As a side-note you can add additional client resources including additional JavaScript and CSS files by setting the name attribute to the name of your Dojo modules. That way the client resources will only be loaded when needed, i.e. when your Dojo modules are loaded.
Localizing the EPiServer dijit
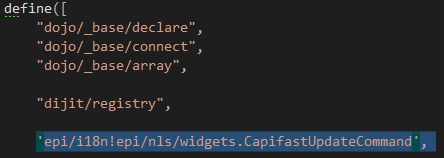
If you look at the dependencies in CapifastUpdateCommand.js you see that I’ve added an EPiServer module which allows us to get localized strings from standard EPiServer language files:
In a language file I have the following:
<language name="English" id="en">
  <widgets>
    <CapifastUpdateCommand>
      <labels>
        <default>Refresh from backend system</default>
        <error>An error occured, try again?</error>
        <success>Page was updated</success>
        <inprogress>Connecting to backend system....</inprogress>
      </labels>
    </CapifastUpdateCommand>
  </widgets>
</language>
Our dependency to epi/i18n!epi/nls/widgets.CapifastUpdateCommand is actually made up of two parts.
The first part, epi/i18n!epi/nls/, indicates that we want to import localized content from a language file. The second part is a standard language path where the slashes “/” have been replaced with dots “.”.
We can then continue using this dot notation to get strings from the language file using the injected dependency object:
The more you know: ‘i18n’
The i18n part stands for “Internationalization”. To avoid having to type that long word over and over again, the 18 characters between “I” and “n” have simply been replaced with “18”.

Ted Nyberg
Ted är grundare av ted&gustaf, teknisk arkitekt och Optimizely MVP med över 15 års erfarenhet av att designa och leda utveckling av komplexa digitala plattformar.


